× This site requires the use of JavaScript. If you have problems using the site, make sure JavaScript is enabled in your web browser settings.

Frequently Asked Questions

To help you become quickly familiar with our site, we have listed the most frequently asked questions by users with easy to understand answers. If you do not find the information you need in these replies, do not hesitate to email us. Click here to send us an e-mail or call us at 1-800-361-4607 for immediate assistance.

No, our shipping to store is done with another carrier. We are not affected by the strike.

A promotional code is entered at the end of the ordering process, on the page confirming the order.

Unless mentioned otherwise, promotional codes cannot be combined with any other promotion or rebate offers. If a promotion code is inserted, while a promotion is offered, the best price value offer will be provided based on the retail price.

Online Orders

Our site is working to make your photo experience consistent across all browsers. Our upload and image management environment is HTML5 based and designed for all recent Windows and Mac platforms including Linux. Smartphones and Tablets on IOS and Android can upload and print straight from their browser environment.

The only requirement is using an HTML5 compatible web browser such as Mozilla Firefox, Safari, Internet Explorer 10+ and Google Chrome. While it is possible to use other browsers on our site, using a supported browser will ensure you have access to most of the products and services available.

NOTE: For security reasons, we do not offer image or album storage on our website. However, we will provide a safe temporary project storage environment to support your creative process for photobooks, calendars, greeting cards, and keepsakes.

As of July 30 2016, we have permanently removed the photo-making module based on Microsoft SilverLight plug-in technology because of the associated security risk with this plugin module

My photo files

We prefer files with a JPG or JPEG extension. However:

  • BMP, PNG, TIF, TIFF, HEIC and HEIF formats are also permitted, but it is best to use JPG and JPEG formats.
  • GIFs are not allowed because they make for poor quality prints.

Image file names must not exceed 150 characters.

We do offer a number of print sizes. The most popular are the regular 4" x 6" format and the 5"x7" format.

  • Regular 4" x 6" format
  • Regular 4" x 5⅓" format
  • Regular 5" x 7" format
  • 4" x 4" and 5" x 5" square format

Other enlargement choices include:

8 x 8, 8 x 10, 10 x 10, 8 x 12, 8 x 14, 10 x 10, 11 x 14, 12 x 12, 12 x 16, 12 x 18, 16 x 20, 16 x 24, 20 x 24, 20 x 30, 24 x 30, 24 x 36, 30 x 40

As well as panoramic versions for most paper widths:

  • 4" x 7" à 17¾"
  • 4½" x 8" à 17¾"
  • 5"x 9" à 17¾"
  • 8" x 14" à 17¾"
  • T-shirt: 8" x 10"
  • Cup: 3,2" x 3,2"
  • Mousepad: 8"x 10"
  • Calendar: 11" x 8,5"
  • Photobook: 8,5" x 11"


We determine automatically the resolution of your picture and we compare it to the minimum resolution required to produce a quality print of the photo (150 ppi – points per inch)

The resolution measured in pixels is the total quantity of digitized data stored on an image. A lower resolution translates into a lower level of detail clarity. Our application tags pictures of insufficient resolution with an "!" or "X". In our app, an ! indicates that you may still print a picture, but it will likely be of poor quality.

An X means that the resolution is too low to be fit for printing.

Our applet indicates the necessary adjustments to optimize your photo according to the selected print size. You can use numerous image editing software tools which will inform you about the size of each photo.

Many factors such as the speed of your Internet connection, the traffic on the Internet and the size of the file will bear influence on the duration of the upload process.

There is no established limited to the number of image files in a single order. Of course, the upload process will take more time if there are many files. What's more, you can order as many as 9999 prints of the same image file without any impact on the upload time.

How To

To upload image files from a folder on your computer, use the search tree on the left panel of the applet to navigate among folders. When you select a folder, the right panel displays the image files it contains if their format is supported for printing.

If you use removable media like a USB key or an external hard drive, you must leave it connected until the upload is completed.

We provide the necessary software: the Microsoft Silverlight applet is automatically downloaded when you begin an order in Silverlight mode. Its sole purpose is to let you choose pictures and send them to our Laboratory.

If your system does not support Silverlight applets, you have the option to use our alternative method with HTML5-compatible browsers to place your order.

No, printing digital images from your computer or mobile is easier. If you have a scanner, you may also scan single copies or old pictures, save them on your computer and order copies or enlargements on our website.


There are several ways to improve your online experience by changing some settings on your computer:

  1. You can change the character size in your browser:

    Most web browsers have a function for displaying smaller or larger characters. On Internet Explorer 6 this function is located in the Display menu. Mozilla Firefox does this particularly well, circumventing websites with fixed character fonts. In HTML mode, we use mostly relative fonts so that you can change their size at will. In places where space is at a premium, we have to use fixed fonts, otherwise, the display would get somewhat quirky.

  2. You can modify your screen and character settings in the display panel of your operating system:

    Our site works with a screen resolution of 1024 x 768 pixels or more.

  3. You can change the colour display:

    Colour settings in the display panel of your operating system should be set to "Colour (16 bits)" or "True Colour (24 or 32 bits)". Recent video cards support 24 or 32 bits, and even older ones usually support at least 16 bits.

    Many screens have buttons which allow you to control contrast, brightness, saturation and so on.

    Please note that our Laboratory is equipped to print your pictures according to very exacting colour standards, while most screens are not as finely tuned. So even if your picture does not look exactly the right colour on your screen, it is usually preferable not to retouch it.

Editing My Pictures

Editing of your photos changes depending on the product you wish to order.

  1. Printing and PhotoBook

    You can reframe your images or change their orientation (portrait or landscape). You can also select part of the picture by zooming in or out, and even remove red eyes:

  2. Other Giftshop products

    You can reframe your images or change their orientation (portrait or landscape). You can also change your images by converting them in B&W or Sepia. If you wish to edit your pictures more, there are several specialized software tools that will give you all the control you want (the best known is Adobe Photoshop). However, you should be aware that some touch ups tend to affect print quality.

You may proceed with different size and cropping to obtain the picture you like best. Take note that our automatic cropping will accept an image only if the resolution is sufficient for the print format selected. If an image resolution is not sufficient, the application will not let you print it.

  • With each order, we will provide you with an expected delivery date. This information is on the confirmation page. This date is a best estimate. We suggest that you call the store before picking up your prints.

  • Except for a few statutory holidays print orders are usually ready and shipped to the pickup store within 3 to 5 working days after the order is placed (store opening hours). Stores located in rural areas may receive orders somewhat later.

  • The production of printed enlargements may also call for extra delays For Gifting products, photo décor, calendars, cards, and PhotoBooks, please allow seven working days.

Silverlight applications need access to your computer Isolated Storage in order to save your photo projects. If the Isolated Storage is not enabled, you can enable it via the Start Menu -> All applications -> Microsoft Silverlight. Once the Silverlight configuration tool is open, go to the Isolated Storage tab to enable it.

Please note that the "InPrivate" mode of your browser automatically disable the Isolated Storage. When navigating with the "InPrivate" mode, you won’t be able to save your projects.

The Making of a PhotoBook

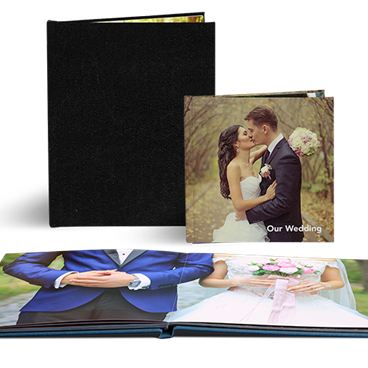
Our software allows you to create in a few minutes, a high-quality PhotoBook that will make you proud. This fun and easy software has been designed in such a way as to show you after only a few clicks, a PhotoBook ready to print. In order to save even more time and effort, we suggest you do a bit of prep work.
  1. Select your type of book. To be done in the website.
  2. Pick your images and decide on their order in the book before their transfer.
  3. Cover's Look. Select the images for the cover and add a title and copy to go along.
  4. View and edit the automatic layout.
    • If the default book proposal is fine with you, just finalize the order by adding it to your basket.
    • If the proposed book layout does not quite meet your expectations, you can edit it all in our Editing Mode.
      Note: JPEG (extensions .jpg or .jpeg) is the only image format accepted.
  5. Add to cart, place the order and confirm it.

Preselect and organize your images: Prepare your images, pick your images in advance and put them in one folder. This way, the image selection is done faster.

Plan your layout: Before you start, ask yourself how many pages you'd like. Then, try to tell a story with your images.

Pick a theme! Focus on one idea! Regroup your images under one theme be it places, events, vacations, newborns, anniversaries.

  • Step 1: Pick your images and prepare them for printing.
    • Select your images and bring them on the worktable for your book project.
    • Organize and arrange your selected images.
      A book will be done by default using all selected images in the order they were transferred on the worktable.
      At this stage, make sure images are properly oriented and organized in the right order.
  • Step 2: Cover components
    • Two images will be suggested for the cover.
    • The first and last images on the worktable will automatically be inserted on the front and the back cover respectively.
      Note: These images may be used again in the book.
    • Personalize the cover by adding a title and text on the front cover and on the back cover. You may also add copy on the spine of the book.
      For more details on the cover possibilities and the use of images on both the cover and a page inside, please view our Help section.
  • Step 3: Book Editing
    Once the cover of the book is completed, the software automatically creates a Photo Book.
    • If you like what you see, you may order it instantly by clicking on "Add to basket".
    • If you want to make changes, then choose Editing Mode.
To work more comfortably on your book project, select Full Screen (F11) in the Display Mode. This feature is now available with the latest versions of Internet Explorer, Firefox and Google Chrome.

My saved projects

Two types of projects are available in your project manager.
  • A project that has been ordered is stored on our servers for a period of 3 years. After 36 months of inaction, it will be permanently deleted.
  • A project that has never been ordered is stored on our servers for a period of 1 year. After 12 months of inaction, it will be permanently deleted.

The expiry date of your photo projects - ordered and never ordered - can be extended for a period of 6 months.

Please note that products from the ‘DIGITAL PRINTING’ family are stored on our servers for a period of 14 days.

Step 1

Go to the Uniprix Photo Center website and log in to your photo account by clicking on "Login".

Step 2

Once logged into your photo account, click on "My Projets".

Step 3

Once in the project manager, select "Nearing expiry project" on the left menu and choose the projects you want to keep by clicking on "Extend".

My photo account

Step 1

Go to the Uniprix Photo Center and log in to your photo account by clicking on "Login".

Step 2

Once logged into your photo account, click on "My Account".

Step 3

Once in the account manager, click on "Close Account".

Step 4

To confirm the closure of your account please enter your password in the dialog box that appears on your screen.